Airtel 3G Free GPRS Hack with two New Working Proxy [Updated]

Airtel 3G Free GPRS Hack with two New Working Proxy [Updated]


Airtel latest 3g free GPRS with two new proxy Airtel 3G Free GPRS Hack with two New Working Proxy

This AirTel   trick is working all over India and You can use any working  homepage in your area with this settings.
 These airtel tricks support Gmail,Youtube,and SSL sites like Mediafire and others...

Now save the below setting and Enjoy. 

»Apn-Airtelgprs.com
»Proxy-50.7.78.53
»Port-80
»Hp-ic.bsbportal.com

I am giving you a fast and fully free proxy for network settings configuration.

Proxy:198.199.73.184
Port: 80

Homepage:Use any Which Working For You.


Airtel Net Pack Hack 2016 [100% Working]

Airtel Net Pack Hack 2016 [100% Working]


Hello Friends ,
Check Out These Trick Now And Get 750Mb 3G Data ( Airtel server down so )
  U can try for Airtel Free 765 MB 3G Data For 25 days-


1) Dial *129#
2) Then select popular packs
3) Select 4 Internet Packs
4) Then select 9 no pack of 765 MB data
5) Activate this pack by pressing one (select auto renewal pack)
 

Check bal *129*08#
Mypclover.blogspot,in

How To Add SEO Meta Tags in Blogger 2016

How To Add SEO Meta Tags in Blogger 2015

Adding SEO Meta Tags in Blogger are very important for any blogger blog, so in this post, we’re going to share How To Add Seo Meta Tags to Blogger, Title, Description and Keywords in Blogger Blog… Meta Tags are most important and most useful for our blog. Search engines manage our site with the help of meta tags. So implementing Helpful for Search Engine Crawling

Google Bots Read Meta Tags of Blogger Blog and Give this info To Google Search Engine So Meta tags are the most important factor in SEO for Blogger
mypclover.blogspot.in
How to add SEO Meta tags in Blogger 2016


ADD SEO META TAGS IN BLOGGER BLOG


META DESCRIPTION


Blog description is a small description about your blog. Your Blog description should be in 160 characters. This is best to fit in Google Search Results.

Read More :-

META KEYWORDS

Keywords should be related to your blog post content to get more and more traffic on your blog from Search Engines. This is one of the basic requirement of SEO. Your Blog keywords must be within 256 Characters. All Search Engines including Google, Yahoo will crawl your keywords automatically from Meta Tags which have added in your blog template.

HOW TO ADD SEO META TAGS TO BLOGGER


 Steps :- 

Step 1.

Login to Blogger –> Go to Dashboard –>  Template –> Edit Html

Step 2. 

Go to <head> section in Template. You can search this from Ctrl+F

Step 3. 

After <head> section put following code in your template.


 <meta content=’Your Blog Description’ name=’description’/>
 <meta content=’Keyword1,Keyword2,Keyword3′ name=’keywords’/>
 <meta content=’Author Name’ name=’Author’/>
 <meta content=’Author Email Address’ name=’Email’/>
 <meta content=’all’ name=’robots’/>
 <meta content=’index, follow’ name=’robots’/>
 <meta content=’Language Name’ name=’language’/>
 <meta content=’Country Name’ name=’country’/>
 <meta content=’blogger’ name=’generator’/>


Step 4

Now Simply Replace your original data to demo data as your need

Step 5

Now Click on Save Template and you are done!

W3Schools Offline Version Download 2016 *Latest*

W3Schools Offline Version Download 2016 *Latest*

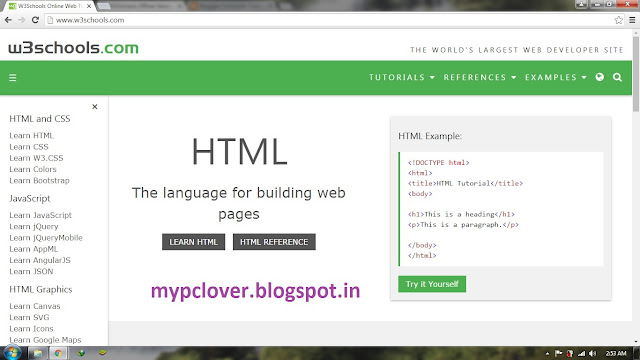
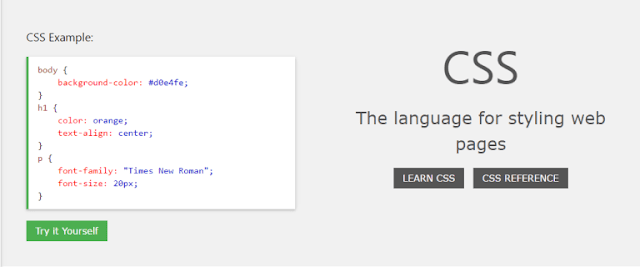
Hello Buddies So In this post we will talk about Latest Version of W3Schools Offline Version 2016 Which you can download it free of cost, if you are interested in the web designing i am sure that most of you are interested in this post, you need to learn some basics HTML , CSS , Java Scripts To Make Your Site with awesome and great content and quality.
Have you ever noticed that w3schools website ranks most  of the search terms in this field,  But it must be sometimes inconvenient to browse that website always online. What if this w3schools can be downloaded? Yes, you can download the whole website full free now! and yes in this post i am going to share the offline version of W3Schools Which you can download free. This the Latest Version of W3Schools Offline Version Recently Updated with Including all files and folders Enjoy.
mypclover.blogspot.in

DOWNLOAD W3SCHOOLS OFFLINE VERSION

This is the latest version of W3Schools Offline Version 2016 and It’s Totally free,Just download and Enjoy!!! 😉
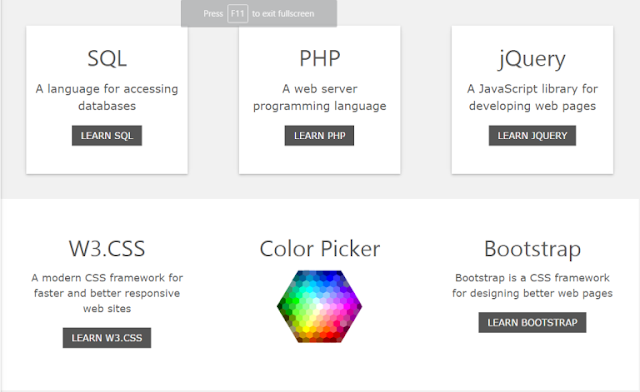
W3schools.com is one of the best websites that can use for learning nearly all most commonly used web designing languages likes HTML,CSS,JavaScript,PHP,SQL,Jquery.

On downloading this website in the offline form you may be able to use most of this websites feature without any Internet connection you may gift this package to your friend who has a burning desire to developer knowledge in web designing field but no Internet connection.
About W3Schools :-

W3Schools Is The World’s Largest Web Development Site Where You can Educate Your Self . If You Search For Any Web Development Code This Website Will Be First In Google Search List 

W3SCHOOLS OFFLINE DOWNLOAD 2016


List of Tutorials

HTML & CSS :

» HTML Tutorial
» HTML5 Tutorial
» CSS Tutorial
» CSS3 Tutorial
mypclover.blogspot.in
Web Building :

» Web Building
» Web Statistics
» Web Certification

mypclover.blogspot.in
Browser Scripting :
» Bootstrap Tutorial» JavaScript Tutorial
» jQuery Tutorial
» jQuery Mobile Tutorial
» AngularJS Tutorial
» AJAX Tutorial
» JSON Tutorial
» Google API Tutorial

Server Scripting :

» PHP Tutorial
» SQL Tutorial
» ASP Tutorial
» VBScript Tutorial
» ASP.NET Tutorial
» ASP.NET WebPages Tutorial
» ASP.NET Razor Tutorial
» ASP.NET MVC Tutorial
» ASP.NET WebForms Tutorial
» Web Services Tutorial

XML Languages :

» XML Tutorial
» DTD Tutorial
» XML DOM Tutorial
» XSLT Tutorial
» XPath Tutorial
» XQuery Tutorial
» Schema Tutorial
» RSS Tutorial
» XSL-FO Tutorial
mypclover.blogspot.in


  • Includes
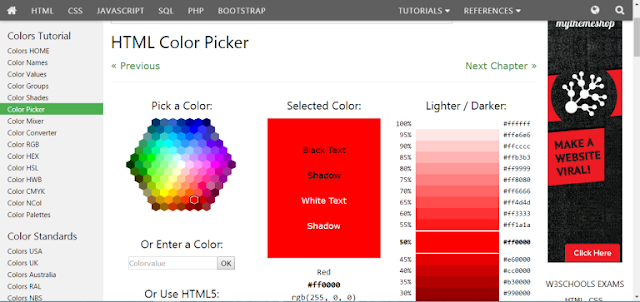
  • Colors Tutorial
    Colors HOME
    Color Names
    Color Values
    Color Groups
    Color Shades
    Color Picker
    Color Mixer
    Color Converter
    Color RGB
    Color HEX
    Color HSL
    Color HWB
    Color CMYK
    Color NCol
    Color Palettes

Download Link :  ⇒ W3Schools Offline 2016 ⇐ 

What is USB OTG and How to Use OTG

What is USB OTG and How to Use OTG

What is USB OTG and How to Use OTG

There are a few words that became popular after Android became what it is today! USB OTG is one of those words. If you own an Android Smartphone or a tablet PC, for that matter — and have friends who do have expertise on Android, you would have heard of USB OTG for sure. Nevertheless, it seems that some people are yet to know about USB OTG and most of those who know about OTG don’t know how to use OTG. In this post, we’d get you an overview of what is USB OTG, notable uses and how to use USB OTG in your Android-based Smartphones or tablet PCs.
what is USB OTG


What is USB OTG?

USB OTG is the popular acronym of USB On-The-Go! Often spoken as just OTG, it is actually a standard —a standard that is used by mobile devices to talk to interact in-between. Through the use of USB OTG, one mobile device will be able to be connected to another mobile device; for instance, your Smartphone can be connected to a USB pen drive, for accessing stored data. Another capability of USB OTG is to set master-slave roles for the connected devices. That is, by setting your Android Smartphone as the master device, you shall make use of additional hardware such as one keyboard or data storage.
What we said above is purely technical, which might not appeal to most of you! Well, from the Android user’s point of view, USB OTG is the method to connect additional hardware to the Smartphone. The list of supported hardware does include data storage, external keyboard, mice, etc. So, this is the basic thing about USB OTG you should know.

Compatibility of USB OTG

Official USB OTG Logo
Source: Wikipedia
As in terms of software, USB On-The-Go is supported by Android v3.1 and later versions! But, not all Smartphones do come with USB OTG support. You can know whether your Smartphone supports USB OTG by looking at the package. There will be the official logo of USB On-The-Go if the device is compatible with the standards of USB OTG. Well, the best option is to ask Google, or check the specifications of the device you have.


Uses of USB OTG

Before we tell you how to use USB On-The-Go in your Android Smartphone or tablet PC, we would have a look at the notable uses of OTG.
  • Additional Storage

Some Smartphones come with non-expandable storage, which isn’t a good thing in this data-hungry world! It is possible for you to overcome this issue if you have USB OTG support. Let that be about music, videos or a few photos, everything can be stored in a compact USB drive and can be accessed through USB OTG. You like to, for instance, backup all the photos you have captured to a secured device. If the device supports OTG, it is possible for you to just connect a pen drive — or an external HDD, for that matter — and transfer all those content to the drive. The best part is that you don’t have to any of these movies or photos in the device, but are readily accessible. Of course, having a compact pen drive is way too better than stuffing your device with GBs of data. This storage can be used for installing applications as well.
  • Additional Hardware

As we said earlier, you will be able to connect external accessories such as keyboards and mice! In our cases, even wireless keyboards work well. Once connected to the Smartphone or tablet PC, you can use the fully-fledged keyboard for inputting data. Similarly, mice can be used instead of touch input — you can move the cursor and click on what is needed. This capability is more useful in tablet PCs, we suppose. Wouldn’t that be awesome if you can connect a small keyboard to the tablet PC and use it as a kind of small notebook? Along with keyboards and mice, several other devices can also be connected, such as MIDI keyboards.

How to Use USB OTG in your Smartphone or Tablet PC?

Of course, you cannot connect a USB device into the Micro-USB port — unless your Tablet PC has a real USB slot in it. In the other case, you have to purchase a USB On-The-Go cable. These cables will be available both in the electronic stores and online shopping sites. However, while buying you have to take care of some factors such as the length of the cable. There are even some snug-fit adaptors, which can be used for connecting the USB device instantly.
By the way, some USB OTG pen drives are also available in stores. These pen drives have two sides. You can transfer data from your PC using the common USB side and then access the same in your Smartphone using micro USB end.
It doesn’t matter which device you are buying. You have to connect it to the micro USB port. In some devices, you’ll have to go to Settings à Storage and click on ‘Mount USB On-The-Go Storage’. In a few seconds, the storage will be mounted and the content will be available in your device.

Conclusion

We hope you now have a clear idea about what is OTG and we are also sure that you have learned how to use OTG to connect to your smartphone. Do you use USB OTG in your Smartphone or tablet PC? If so, what do you use it for?


4 Insanely Useful Apps to Control PC with Android Device

4 Insanely Useful Apps to Control PC with Android Device


Earlier, we had told you some cool ways to access your Android Smartphone using your computer — so that, you can manage your Smartphone right away from the PC screen. We hope those apps helped you to check out your SMSs or WhatsApp messages without having your phone in your hand. Now, it’s time to take things the other way round.
By the way, wouldn’t that be great if you can control PC with Android Smartphone of yours? For instance, wouldn’t it be awesome if you can use your Smartphone to control the slideshow presentation that is running on your PC? Well, if you think it’s so, we have some effective solutions to control your PC with Android apps there.
Control PC with Android Apps

TeamViewer Remote Control for Android

You would be certainly familiar with TeamViewer if you have been into remote desktop access; when you want to let your friend access your computer screen for helping with something. It’s a good thing that TeamViewer has brought its official applications for Android, so that you can control your PC using the Android Smartphone. You are going to have almost all the features you’ve had in TeamViewer desktop versions, such as the complete control of PC, the live chat feature etc. Though, you might be having some issues because of the smaller screen of your device. Setting up TeamViewer for PC-Android access is also easier.
TeamVeiwer Access


4 Insanely Useful Apps to Control PC with Android Device

Earlier, we had told you some cool ways to access your Android Smartphone using your computer — so that, you can manage your Smartphone right away from the PC screen. We hope those apps helped you to check out your SMSs or WhatsApp messages without having your phone in your hand. Now, it’s time to take things the other way round.
By the way, wouldn’t that be great if you can control PC with Android Smartphone of yours? For instance, wouldn’t it be awesome if you can use your Smartphone to control the slideshow presentation that is running on your PC? Well, if you think it’s so, we have some effective solutions to control your PC with Android apps there.
Control PC with Android Apps
We actually have created a list of some effective Android apps that can be used for PC remote control. However, we will also mention the working procedure and significant details about every app, so that you can pick the convenient option from the list.

TeamViewer Remote Control for Android

You would be certainly familiar with TeamViewer if you have been into remote desktop access; when you want to let your friend access your computer screen for helping with something. It’s a good thing that TeamViewer has brought its official applications for Android, so that you can control your PC using the Android Smartphone. You are going to have almost all the features you’ve had in TeamViewer desktop versions, such as the complete control of PC, the live chat feature etc. Though, you might be having some issues because of the smaller screen of your device. Setting up TeamViewer for PC-Android access is also easier.
TeamVeiwer Access

Setting it Up

Once you have installed TeamViewer in your Android device, you can open the application. TeamViewer needs to be installed in the device that you need to control. From the device, you can have the TeamViewer ID and password. It’s just a process of entering the TeamViewer ID and password, and you will be connected to the device in no time. You will be able to enjoy all the features of TeamViewer, including the multi-monitor support, full support for keyboards, in-built file transfer options, 256Bit Encryption standards, touch gesture support etc. The best part of TeamViewer is that you can even control unattended devices such as servers.
TeamViewer app is available for Windows, Mac and Linux; you can use your Android Smartphone to control all these devices. When you need complete control over a device — including the OS-specific features —, you should choose to go with TeamViewer Remote Control for Android. You can get the app from Here

Chrome Remote Desktop

Are you positive about using your favorite browser as a mediator for accessing PC from Android? If there is a YES, it makes sense to check out Chrome Remote Desktop, which is a multi-device solution from Google Chrome. Using this solution, you can control your entire PC from the Smartphone screen. When compared to the typical process of PC Remote access, Chrome Remote Desktop has a relatively simple process, making it a suitable solution for urgent-sort of needs. Of course, you will have to give complete freedom to your Google Chrome browser, so that it has complete access to the PC screen and functions.
Chrome Remote Desktop

Setting It Up

There are two main steps involved in Chrome Remote Desktop method of PC access from Android. First, you need to install Chrome Remote Desktop application on your Android Smartphone or tablet PC. You may have to sign in using your Google account, which is a simple thing. On the PC Chrome browser, you have to install the Chrome Remote Desktop extension. Once you are all set, you receive a pin and you can enter this pin in the Smartphone screen to get a successful connection. From then, you have complete access to the PC, such as keyboard, windows and what not.
This is yet another universal method to access your computer from Android. Thankfully, Chrome Remote Desktop is compatible with Windows, Linux and Macintosh — because Chrome is available for all these. It has to be noted that the solution isn’t restricted to Android-PC duo; you can use it for controlling other Windows PCs too. So, we repeat, Chrome Remote Desktop is the convenient solution for short-term needs and when you need complete control with PC. The Android App is available in Play Store, and you can get the extension from Chrome Store.

Remote Control Collection

Here we have some not-so-popular method to control your PC using your Android Smartphone. However, this tool is not meant to give you complete control over the PC. Instead, Remote Control Collection takes a different approach, which is task-oriented. Instead of giving you complete access to the computer, Remote Control Collection has made six divisions to the capabilities — which are Mouse, Keyboard, Live Screen, Media Player, Slideshow and Recognition of Speed. Out of these, some features are available only in the Pro version. So, in one way, the capabilities of its free version are limited.
Remote Control Collection

Setting it Up

The process of Remote Control Collection setup may be a bit boring at the first look, but they do take a few seconds or minutes. Once you have installed the Remote Control Collection application on your Android device, you’ll have to find the corresponding app for your Windows or Mac device. Once the installation is over, you will get the host IP address from the PC client. Then, you can find the Android app to find the local IP address and connect to the device in no time. Both the devices need to be in the same network to establish the connection. If that’s right, you will now have connected your Android device to the PC and you can start controlling it, right away.
As we said, the functions are action-specific. For instance, in the Mouse control mode, you can use the Smartphone as a track-pad for your device. On the other hand, if you take the Keyboard mode, you will have access to keyboard of device. On the other hand, if you go with Live Screen, you can have realtime control of the PC, via touch screen of your Android Smartphone or tablet PC. Also, there are options for Media Control and Presentation Control. You can get Remote Control Collection Android App from Play Store.

Unified Remote

Unified Remote is an effective method to control your Windows or Mac PC from the Smartphone PC. As opposed to being a fully-fledged remote access solution, Unified Remote is more like a PC remote that is quite convenient too. If we compare the setup process to that of others, Unified Remote has a simpler mode of configuration, which is a nice thing actually. However, when looking from the quick productivity point of view, Unified Remote is the best solution we came across.

Unified Remote

Setting It Up

Of course, there are two steps to be completed, on the Smartphone and PC level; both steps are quite easy to do. If you have installed the Smartphone application from Play Store, you can get the corresponding server software from the official site of Unified Remote. It is currently available for Windows, Macintosh and Linux, and some older OS are also supported. Once you have installed and started server, you can use Wi-Fi or Bluetooth to establish connection between both devices. Then, you can use different remotes of Unified Remote — such as Mouse Control, Keyboard control, Media Control etc — to get the best experience of remote access of your PC. Personally speaking, we tried using the app as an alternative to the track-pad; that is, we were using the Smartphone screen as the track-pad.
As mentioned, Unified Remote is compatible with almost all the platforms, and the installation is way too quick. The only limitation is that you have to pay for the good features, and you get only keyboard and mouse control in its free version. Altogether, when you are running out of time to control PC with android apps, Unified Remote is the name to rely upon. You can get the Android App from Play Store and the Server Software from here.

Control PC with Android – Conclusion

So, we have mentioned four effective methods to control PC using Android apps! Out of these, two solutions do give complete control over the PC whereas the other two are for function-specific — such as mouse control or keyboard control. Either way, you can suit different instances with one of these methods. In addition to these, there are some other remote assistance apps such as Microsoft Remote Desktop, but they are not that good in practical sense. By the way, do you use any other solutions for controlling PC with Android Apps? Do let us know if you do.